Tampilkan postingan dengan label recipe. Tampilkan semua postingan

17 Januari 2012

Recipe: Harissa Deviled Eggs


Over the holiday break, I came to Jesus a little bit.

Okay, I realize that may provoke more questions than it answers. Basically I came to the realization that I cannot eat eggs fried in butter for breakfast every day. It is too rich for me. But hard boiled eggs? They have long been a go to for me. I get all the good stuff from the egg without quite so much fat, which can upset my stomach and weigh me down if I eat too much of it.

But on New Year’s morning I was looking for something more interesting than just a hard-boiled egg. And so Harissa Deviled Eggs were born. These deviled eggs are about as easy to make as drinking too much on New Year’s Eve while letting your kid stay up until midnight. I actually served these as a breakfast/ brunch main dish, and they were perfect. But the best part? Thing 2 wandered over to the table and took two hefty bites without being asked. All this from a child who has not tried a new food in easily 6 months. Perhaps there is a light at the end of the tunnel yet.

Harissa Deviled Eggs

5 hardboiled eggs, peeled and cut in half
1-2 tablespoons of harissa mayonnaise that you forgot to serve at your dinner party the night before (i.e.-about ½ cup mayonnaise mixed with about a tablespoon of dry harissa, a shake of garlic powder and a hefty pinch of salt, let sit for at least 30 minutes) I encourage you to use homemade mayo, mayo made from something besides soybean oil or organic mayo. This will help you aoid GMOs and overly processed industrial fats.
Bacon, if your children haven’t eaten every last piece in your house


Remove the yolks and place in a bowl. Add 1-2 tablespoons of the harissa mayo. Mash the yolks and the mayo together until it forms a paste. Add crumbled bacon if you live on the edge. Season with salt and pepper to taste. Spoon the paste back into the hard-boiled egg halves. No need to sprinkle with paprika, unless you are a traditionalist.


Enjoy!

3 Januari 2012

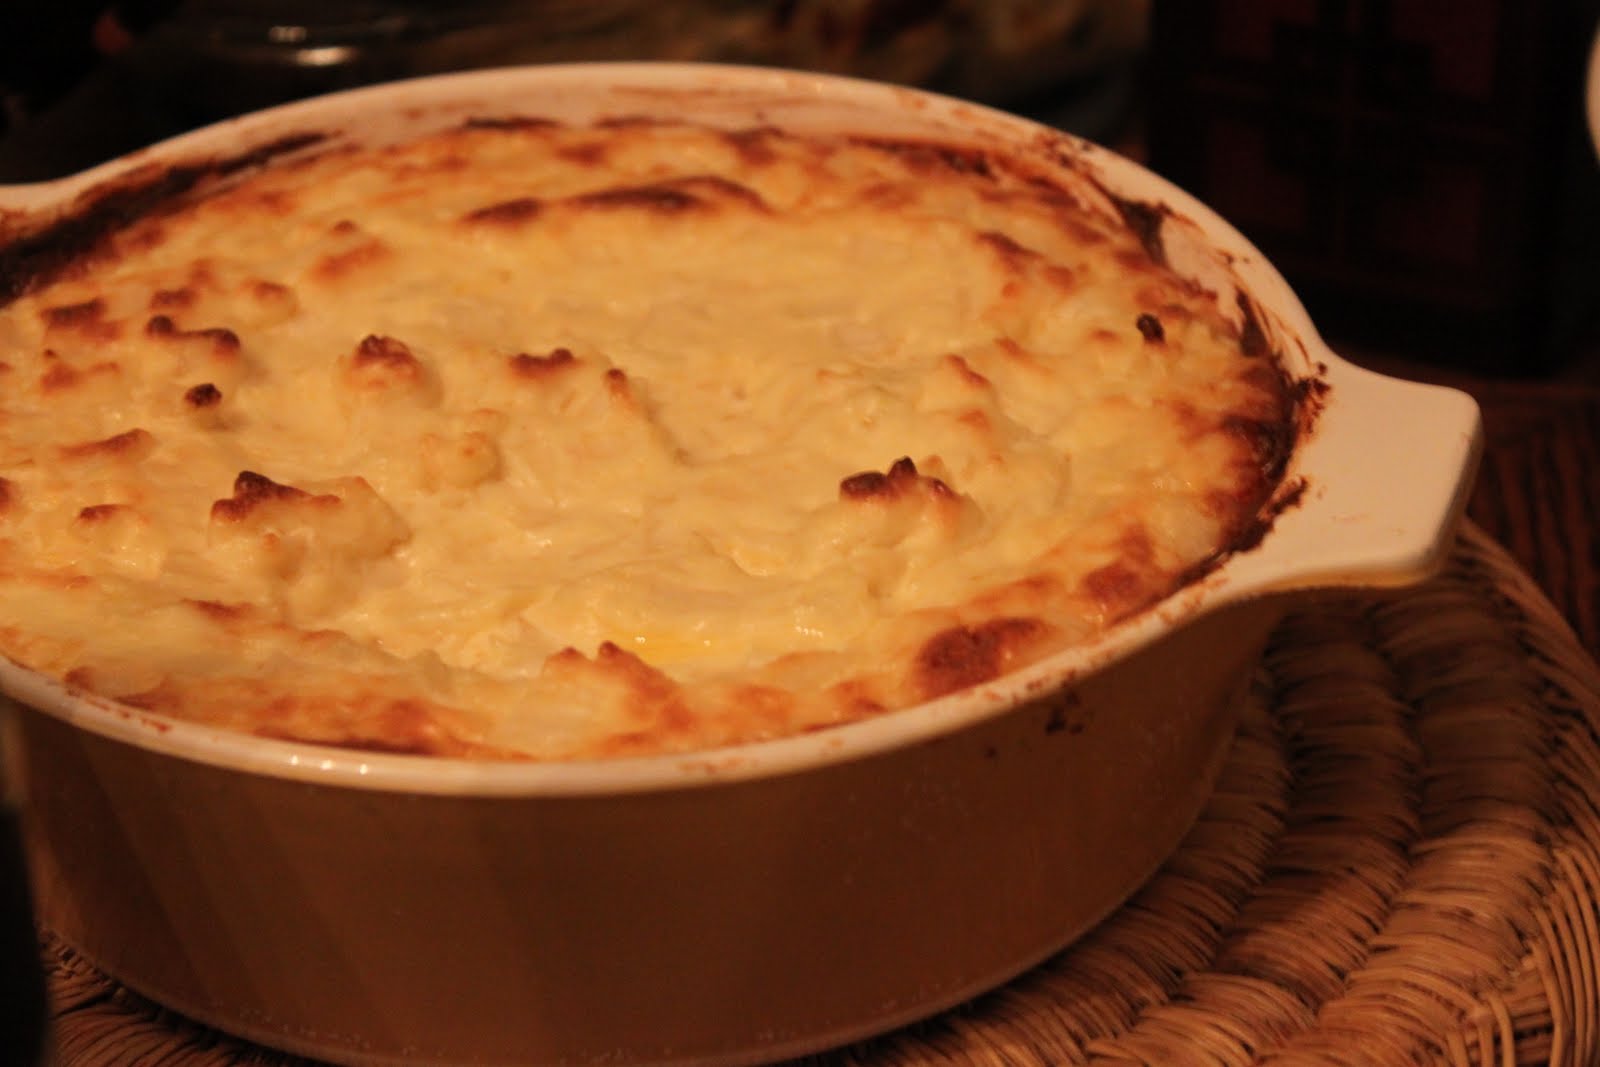
Recipe: Hot Onion Souffle


Happy New Year's everyone!! I have emerged from my Holiday cocoon rested and relaxed and maybe even ready to tackle this new year. We put our time off to good use. We hosted my folks, cleaned out the house, cooked with abandon and actually beat the now "old-timey" game Legend of Zelda on our Wii. Okay, DH beat Legend of Zelda and Thing 1 and I contributed in small ways and by cheering. But all of us, including Thing 2, enjoyed watching it go down.

But wait...in my last post over two weeks ago I promised THE PERFECT holiday dip! And I never followed up with a recipe! Oh the injustice. I suppose that I am exactly what I always have promised I would be-inconsistent at best. But...we did host a fantastic New Year's Eve party and I do make this dip whenever we are getting together with people that we want to impress so I thought it would be wrong of me not to share the recipe with you.

I always get lots of oohs and aahs when I serve this dish. But it is rich and I have decided that high fat diet or no high fat diet, this dip is not good for you. It is doing you no favors on the waistline or anywhere else for that matter. Don't try and kid yourself that this dip is high in whatever vitamin or antioxidant that onions posses. This dip is purely for pleasure.

I got this recipe from my sister in law. But I am fairly certain that she got it from some southern Junior League cookbook. But in just one google search I found a few claiming the recipe as their own. I add that just so you know I am not trying to selfishly claim this as my own. I did not invent this mash of amazingness.

Hot Onion Souffle

2 Packages cream cheese (I love Organic Valley's), at or near room temperature
1/2 cup mayo
1 large sweet onion, finely minced
1 cup shredded Parmesan

Mix ingredients.

Spread in a dish.

Bake at 350 degrees until the top begins to brown at the edges. Do not over bake or the dip will begin to separate and get oily. I have done that, not good. Serve with crackers or if you dare, Fritos.


This is so good that it might actually be worth the extra pant size. Happy New Year people! I am happy to be back in the blogging saddle. I look forward to a new year full of new posts!!

Enjoy!!

5 Desember 2011

Mashed Potatoes and Celeriac: This Doesn't Even Qualify As A Recipe


I am mentally prepared for winter this year. Last year I balked at winter vegetables. Rather I longed for tomatoes and strawberries and fresh baby spinach. I admit I ate fewer vegetables during the fall and winter than I should have. Not that that is such a big deal, but I feel better when I eat 5 fruits and veggies a day. Getting to that number between November and April can be a challenge for me.

This year I plan on working on that. I won't be perfect. Winter veggies take longer to prep and I can say with confidence that aside from carrots my children don't eat veggies that grow in the winter. But this isn't about my kids, this is about me accepting winter veggies for exactly what they are...fiborous and tough and maybe slightly delicious.

As a going away present, my CSA gave us 3 bulbs of celeriac in our last delivery. Celeriac is also known as celery root. Celery root is funky and rooty and severely ugly. I can't say I really know what to do with it, though I have thrown it into stock and vegetable soup. But vegetable soup is a shameful cop out for any proud veggie. How does one eat celeriac so that it shines in a leading role? Sheesh, I don't know.

Someone mentioned to me to mash it. But the flavor, like starchy celery, didn't appeal to me. So instead I boiled it alongside some purple potatoes. I added cream and butter and salt, mashed them and I was in heaven. The texture was lighter than my normal dense mashed potatoes. The celery flavor was delicate and nicely matched with the earthy potato. All in all I have to say...I think I like celeriac mashed potatoes even better than regular mashed potatoes. I think someone somewhere is turning over in their grave. Someone....somewhere....

Definitely try this. I think I will even buy celeriac in order to keep making this dish. One winter vegetable down and many, many left to go

Enjoy!

This post is shared with Simple Lives Thursdays

24 Oktober 2011

Recipe: Sausage and Kale Pasta in Creamy Tomato Sauce


This is hands down my favorite new dish. I use pasta to bridge the gap in weeknight meals. Before school started we only did pasta once or twice a month and I viewed it as a cop out meal. But with the new intense school schedule I am changing my tune. Plus my kids usually eat it, which lessens the tantrum duties.

I figure a good way to make pasta more of a meal that sticks to your ribs and not your belly is to load it up with sauce. My sauce to pasta ratio is pretty high. I like it soupy. Then I make sure that the sauce is filled with lots of different veggies and pastured meats! The following combination has been helping me to sneak more green leafies into my kids bellies. After serving this dish 5-6 times in the last few months I am happy to say that they no longer fuss over seeing the greens in the sauce

Sausage and Kale Pasta in Creamy Tomato Sauce
1/2 pound of pork sausage (but really any old thing will do, leftover cooked sausage, ground beef or turkey, even leftover meatloaf)
1 cup of kale chiffonade
2 cups prepared marinara sauce
1/4 cup heavy cream
8 ounces of dried pasta (I am not going to be hypocritical enough to encourage you to eat whole wheat pasta, I have currently fallen off the whole wheat pasta wagon....trying to get back on. It's hard

In a large skillet, sautee your sausage until well browned. I do not drain the fat. I think it adds something to the final dish. Add the kale to the pan and wilt. Next add the prepared marinara. I usually keep a meat free version of this sauce on hand in my freezer. That is what makes this a weeknight meal. When the kale is cooked and the sauce is all unctious and delicious looking, stir in the cream. My kids don't like when the sauce is super pink, so I have to restrain myself to about a quarter of a cup. You can add more if you want, because Good God it is worth it.

Finally cook your pasta in boiling salted water for about 9-10 minutes. Drain. Then let the cooked pasta simmer in the sauce for another 2-3 minutes. Serve and top with grated parmesean and a big salad (if you are more effecient than me).

MMMMMMMmmmmmmmmmmm.

On a side note, DO NOT substitute the cream for anything. ANYTHING!! Half and Half will not work in a pinch. The tomatoes are too acidic and will curdle any dairy product without enough fat content. Cream is the only thing that can stand up to tomatoes. Otherwise it will just look like you added ricotta cheese to the sauce. Though that might be good in a pinch now that I mention it....

I hope you will try this. I definitely don't feel 'bad blood sugar' vibes after having this dish. The veggies, meat and fat certainly stand up to the pasta. I always feel full and happy after eating this. You could also easily add in other veggies! Great additions might be fennel, eggplant (I have done that with success!), summer squash, etc. I am sure you could come up with a ton.

Enjoy!

This post is shared with Traditional Tuesdays and Fat Tuesdays, Real Food Wednesdays

10 Oktober 2011

The Ups and Downs of Making Homemade Hot Sauce


You know what they say, 'If at first you don't succeed, try, try again!'

When we first began cutting out processed foods early last year, I thought mostly about making our about our meals and our snacks from scratch. I never gave much thought to our condiments. Condiments were, in my mind, an INGREDIENT, not something with their own list of ingredients! Making homemade mustard and mayonaise, however, have been some of the highlights of our eating non-processed foods. My interest in making condiments stems slightly from my desire to know exactly what is in my food, my homemade versions do not contain yucky preservatives or food colorings. But really I think my interest comes from the desire for enlightenment. How does one go about making mustard? I mean, who is even talking about that?

I read The Nourished Kitchen's recipe for Fermented Hot Sauce almost a year ago. And I was fascinated by it. The ingredient list was impossibly small, peppers, salt and whey. The whey is even optional. And I do love a good hot sauce! But the post came out after pepper season was already over here last year. So I waited until this year.

I have investigated my beloved Frank's Red Hot and it does not contain any highly processed ingredients. I was pleased about that. But I am concerned about the salt content of such sauces. I am definitely a hot-head. If I am not sweating, it is not hot enough. On tacos and chili and the like I use alot of hot sauce to achieve my desired heat level. Alot of hot sauce equals alot of salt. And too much salt doesn't do anyone any good. So....that was my other motivation, not having bags under my eyes the morning after a heat seeking journey.

The first time I made the recipe, I followed the recipe. But I only had 9 ounces of peppers. So I adjusted the measurements accordingly. It was unlike other fermented recipes I had tried because there was no bath of whey and water enveloping my pepper puree. I was concerned about how the whey was going to get to all my peppery bits. Then after two or three days, my habenero puree came down with a powdery looking white mold on the top. I left the jar sitting on the counter for almost two whole weeks before I decided to deal with it. After reading several articles that told me that no injury would befall me as long as the mold was white, I decided to proceed. I finished the recipe. And my sauce was the exact consistency of my Frank's Red Hot. But the habeneroes made it super crazy ridiculously spicy. My kinda sauce!

I am living proof. White mold on the top of fermented foods will NOT make you sick. Whatever it is, it is benign. However.....the white mold does do something to the flavor. My super crazy hot sauce, as much as I wanted to love it, tasted off. It tasted turned. I ate it several times before I threw it out and started over. I never got sick but I never LOVED the sauce.


On my second try I purchased a greater quantity of peppers so as to remain closer to the original recipe.. Habeneroes are all done around here, so I chose serrano peppers. The original recipe calls for three POUNDS of peppers. Do you have any idea how much three pounds of peppers is?! It is a crazy amount. Only slightly less than 2 pounds fits into my food processor, so that was where I stopped. I used the full amount of whey given in the recipe. And the full amount of salt. I also figured since I had a mold problem the first time around I should add a quarter of a cup of water so as to increase the whey's ability to get into every pepper crevice. I did not want mold coming to the party this time!

Fortunately the sauce fermented on the countertop for a full week, and no white mold ever developed. Hurrah!! I strained the sauce and tasted it. It had the right balance of salt and sour from the fermentation. It was perfect on the heat level! It was overall exactly what I wanted it to be. Only problem...the sauce is way to watery. It is fine to add to chili. But it has the same consistency as water. So putting some on a taco might not be so awesome.


Oh well...here we go again. Do I make a new batch? Or just live with this one? Did I make a mistake in adding the extra water? Did I not strain it well enough?

I had a truly brilliant math teacher in high school that always told us, 'You don't learn much from a right answer. One must do many many things right to get a right answer. But when you get a wrong answer it is important to look back at your work and find the ONE thing you did that produced the wrong answer.' Every recipe we make is an opportunity to get some new outcome. Limiting sugar, replacing eggs for baking soda or playing with water contents have all been some of the things I have tried in coming up with the perfect recipes. And with each triumph and failure I have learned something new. Some recipes have been good. Others have been total throw aways. This one has been in between. But I definitely plan on dusting myself off and getting this one right again.


This post is shared with Traditional Tuesdays Healthy 2Day Wednesdays and Real Food Wednesdays and Simple Lives Thursday and Fight Back Fridays

26 September 2011

Recipe: Savory Sausage and Eggplant Casserole


I cannot deny fall any longer. School has been up and running for 3 weeks already, the carnivals and harvest festivals are everywhere. And in one week buildings around the city will legally have to turn on the heat if the overnight temperatures fall below 55 degrees. (Or something like that.)

Yet saying goodbye to summer has been bitter this year. Perhaps it was the killer tan I had this year during the days when I actually got sun. Perhaps it was the time off from work. Perhaps it was because my DH was home for several weeks this summer playing with the kiddos and helping out around the house. Our schedule was leisurely, our fridge was full of fresh fruit and although it was wickedly hot much of the time the sun felt clean and clear on our skin. Now here I am sorting through my closet, up to my ankles in corduroy and opaque Spanx, and I can't find any excitement about it at all.

This time of year DH is always playing Simon and Garfunkel and reminding me how they conjure fall for him. His memories of all-boys Catholic prep school will forever endear him to the fall season. Starting school gave his life structure and meaning. I normally find excitement this time of year in pull on boots, corduroy skirts with over sized belts or sweaters that hit just below the waistline. Oh! And brightly colored cardigans. But this year. I just keep looking at my sun dresses and white pants with melancholy.

Eggplants and tomatoes are the fruits of a dying season. Nurtured by long hot days they seem to come of age just as the days begin to shorten. While tomatoes are coaxed into being for much longer seasons by farmers who know that the tomato is a cash cow, eggplants are free to do their own thing. Not every person you know will eat an eggplant this season. And my family and I might only have 2 or 3 in any given late summer. But they are some of my most favorite of all vegetables.

Eggplants cook down into a mush that is not sweet and not bitter, but yet a bit of both. They are also usually cooked in so much olive oil that this fatty and creamy texture is cooked right into the vegetable pulp. The following recipe is not one that will be kind to your waistline. It is quite the fattening dish. But it is one that will help to coax out some of those tears that you have been unable to shed over summer's demise.


Sausage and Eggplant Casserole
FOR THE SAUCE:
1 pound sausage (preferably pork, but that isn't entirely necessary, definitely ethically raised though)
1 peeled and cubed eggplant, about 3-4 cups (any variety)
1 medium sized onion, chopped to a medium dice
2-3 cups prepared tomato sauce
1/2 cup finely chopped kale (in a chiffonade if you will)

FOR THE POLENTA:
5 cups water
1 teaspoon salt
2 cups dry polenta
1 cup heavy cream

FOR THE TOPPING:
Fresh mozzarella and Parmesan cheeses

In a larger skillet than you think you need (that has a lid), begin to cook your sausage. When the sausage is cooked through but not yet brown, add your onion and eggplant and stir. Cover and cook until the eggplant begins to soften, maybe 30-40 minutes. At first the eggplant will soak up all the fat in the pan. But as it cooks it will release it all back into the dish. Notice I didn't say drain the fat from your sausage? Well, that is why this recipe is so good. The fat is crucial to the flavor of this meal. If your sausage is very lean like turkey sausage, add about a quarter cup of olive oil during browning. This oil will prevent burning, don't remove any of it.

When the eggplant becomes very soft add the prepared tomato sauce and the chiffonaded kale. The reason for the stipulation on the kale is that while you want to add some more vitamins to this dish, you don't want it to be thick and chewy. The idea is that the kale will melt into the sauce. You can completely omit it if you prefer. Allow the sauce to cook for another 45 minutes to an hour until all the flavors have combined.

In another pot, bring your 5 cups of water up to a boil with the teaspoon of salt. When the water is at a rolling boil, add your polenta while whisking to avoid clumps. Allow polenta to cook. I recently saw on TV that polenta that is fully cooked naturally pulls away from the pan when stirred. It reminded me of when bread dough comes together. I added my cup of cream when this happened. It is worth it to note however, your polenta will likely not look like bread dough coming together. It just won't be quite so amorphous and sticky. It will get very thick when fully cooked. Undercooked polenta is NOT delicious.

Pour your cooked but still hot polenta into a casserole dish. Spread evenly over the bottom. Do not wait for your polenta to cool before you put it in the casserole dish. Cooled polenta will take on whatever shape it was in while cooling. You MUST get it into your casserole dish while it is still warm. Layer your sauce on top of the polenta, and also spread in an even layer. Lastly top with cubed or sliced fresh mozzarella cheese and grated Parmesan.

Bake the casserole in a 350 degree oven until the cheese has become melted and yummy looking on top.


Serve, and try not to eat the whole freakin' pan. It will be hard. But you can do it. Think of the amazing lunches and leftovers you will have!!! And yes, you are reading correctly, this recipe takes apx 2 hours to cook. It is definitely a weekend effort. But it does freeze beautifully. Even better, make a double batch and eat one and freeze one!

The Things did NOT eat this meal. Neither one said they liked sauce that night. Go figure. They are difficult to understand and even more difficult to anticipate. Oh well, more for me!

Enjoy!!

This post is shared with Melt in Your Mouth Mondays and Traditional Tuesdays and Real Food Wednesdays and Simple Lives Thursdays

30 Agustus 2011

The Proper Way to Soak and Cook Beans AND My Secret To Perfect Refried Beans

Long before I knew that the quality of a margarita was paramount to the the success of a Mexican restaurant, there was this little place in Memphis called Molly’s La Casita. There may still be a Molly's downtown on Central Ave, though I am not sure if it is open today. We would frequent the Park and Mendenhall location before it shuttered in the early Ninties.


Like the routine loving child that I was, I would always order the exact same thing at Molly's, the Tres Tacos. Three crispy tacos of seasoned ground beef with Mexican red rice and the most ridiculous refried beans imaginable. I can still imagine the taste, but I could not ever find a replacement to them. A nice dark brown color, they were the right balance of meaty and salty. They were ever so slightly pasty but the beans still held their shape creating a balance of texture. They did not reduce to a soupy one note sauce as many lazier restaurants' beans do. Molly's sublime legumes defined refried beans in my mind and virtually all my subsequent encounters with the side dish have been met with abject disappointment.


Recently I have unlocked the secret to these beans, these pearls of protein. Lard.


Yup. Sorry to burst your bubble. You were expecting paprika maybe? Lard is the secret of the best refried beans imaginable. But lard needn’t scare you. It is not any higher in fat than butter or olive oil. And many people are surprised to learn that lard is highest in monounsaturated fats, though it does contain some saturated fat like all fats do. Lard from ethically treated pastured animals is also high in Vitamin D. It is not a fat to be feared. But lard is tricky. Although it is an animal fat many manufacteurers hydrogenate lard to make it more shelf stable. And hydrogenation is bad. So few people are buying and cooking with lard these days that it is much better to render your own. Any butcher could get quality leaf lard for you. I order mine from Lewis-Waite Farm. It freezes well and the rendered fat keeps in the fridge indefinitely. And while my recipe isn’t necessarily authentic (I don’t know, maybe it is! I just kind of made it up), this warm-your-bones side dish is a great accompaniment to a lean meat dish!


Refried Beans

2 pounds of dried pinto beans, or a combination of pinto and kidney beans

Salt to taste (I used around 1-2 tablespoon)

1/4-1/3 cup of rendered leaf lard

Optional sliced onion, garlic, cumin, paprika and black pepper


Stay with me...the following recipe is longer than it needs to be. But I am specific for a reason.


Start by soaking your beans. It takes times. Properly soaked beans not only digest better, allowing your body to access the nutrition better, but proper soaking and long slow cooking helps to de-gas those beans as they work their way through your tummy. The Weston Price Foundation has a wonderful article on exactly how to soak beans called Putting the Polish on Those Humble Beans In it Catherine Czapp schools us on the proper temperature for your soaking water and why that is. I will attempt to recreate that here.


Start by placing a medium sized pot of water on the stove stop, about 10-12 cups. Take your beans and place them in a collander. Wash them thoroughly and remove any dirt, sticks or rocks. Transfer your beans to a large bowl. When the water begins to form tiny bubbles on the bottom of the pot but BEFORE it begins to boil, take the pot off the heat and pour it over your beans. Although the water is hot, you should be able to touch it without burning your hand. If it feels like a comfortable warm bath your water is not hot enough. If your hand burns upon touching the water, it is too hot. By the way, please use your common sense. Please DO NOT stick your hand in a pot of boiling water. I am absolutely not advocating that.


Once you've added your hot water, stir the beans and allow then to soak. Drain the soaking water and repeat the process 3-4 times over the course of 24 hours. After a day of soaking they will feel springy like fresh, uncooked beans.


Drain the final batch of soaking water and place them in a Dutch oven or large pot. Cover them with cold water and put them on to boil. To the pot place add half a sliced onion, one to two minced garlic cloves, paprika and cumin, a good tablespoon of salt and freshly cracked black pepper. If I was a better blogger I would have written down all the measurements. But I don't really measure as I cook. Oh well, I will make that as a goal for NEXT year. Let the beans come to a boil and then turn down the heat to a simmer. As they cook you can add more water if you need. You want to avoid a roiling boil or else the beans will cook too fast and the beans will be GASSY! Give yourself several hours to cook them. A crock pot is also a wonderful thing to use to cook the beans slowly. But whenever I use use a crock pot to cook beans I always end up finishing them on the stove top....but more on that later.


When the beans are cooked through and very soft, taste them for seasonings. Add more salt as needed. Remember you can always add more, but you can't take any away. Turn the heat on higher to evaporate any water. The higher boil will also begin to break up the beans. Stir the pot and they will break up more. That is what you can't get from a crock pot. The crock pot gets the beans soft, but it doesn't break them up. That's why I always finish them on the stovetop. When they are the right consistency, kinda pastey kinda spreadable but not destroyed, heat up a good heavy pan. And throw in your lard.


Melt your lard. When it gets hot enough to fry, spoon in your beans slowly. Stir them around to incorporate the fat. Add more water or adjust the seasonings.


And there you have it, refried beans. Meaty. Salty. Amazing with tacos. Not slightest bit vegetarian. Use the leftovers to make chili, or throw them over eggs with hot sauce for fantastic huevos rancheros. Or just eat them over rice with sensual slices of avocados. But please please please whatever you do, don't substitute the fat. It is lard, or it just isn't as good.


This post is shared with Traditional Tuesdays and Real Food 101 and Real Food Wednesdays and Healthy 2Day Wednesdays and Simple Lives Thursday and Fight Back Fridays and Momtrend's Friday Food Link

12 Juli 2011

Recipe: Chiles Rellenos

As you all know, my love of all foods Mexican continues. My dear friend TQ again shows us a beautiful authentic Mexican recipe. With pepper and tomato season almost upon us (or totally upon you depending on where you live), this is a great meatless recipe to try out. Be sure to check out TQ's other post on Authentic Puerco en Adobo. Thank you again to TQ for contributing! Enjoy!

Chiles Rellenos (Poblano peppers stuffed with cheese in an egg batter)
Ingredients:
8 Medium to large Poblano peppers
Oaxaca cheese (mozzarella is ok too)
2 or 3 eggs
Flour for dredging
Tomatoes
Chicken Stock
2 cloves of Garlic
4 or 5 peppercorns
Salt
Oil or lard for frying

Roast the peppers in your broiler or directly on the flame of your burner until skin is charred and peeling. Let them rest, preferably in a paper or plastic bag, but it’s not necessary.

Meanwhile, boil tomatoes until soft and skin is peeling off.

While your peppers are roasting/resting and tomatoes are boiling, separate the cheese into segments about 3 to 4 inches long and 1 to 2 inches wide. It doesn’t have to be precise, you want it to fit inside the pepper but you want to fill up the pepper too.

By now your tomatoes are ready. Remove skins and discard. Place tomatoes into a blender with the garlic, peppercorns, salt and enough stock to loosen the blade. Puree.

Add a couple tablespoons of cooking oil to a pot, when it’s good and hot pour the tomato sauce into the pot and add a little more stock so it’s fairly thin and soup like, bring to a boil and then simmer. It should reduce a bit but you want it kind of thin.

Back to the peppers. Peel of the skin. Cut a slit down the side of each pepper and remove as much of the seeds and veins as you can without tearing the flesh. It’s not the end of the world if it tears, but do your best. Stuff cheese into each pepper and set aside.

Heat oil or lard in a deep frying pan, you want it ready for you because once the eggs are beaten you have a narrow window before they start to fall.

Now, separate your eggs and put the whites into a large mixing bowl. Beat with beaters or stand mixer to a firm peak. Then, one by one, add the yolks in and keep beating. It should look like yellow meringue.

One by one, dredge the stuffed peppers in the flour to coat, and then dredge in the whipped eggs carefully coating the entire pepper, your fingers will get battered too, that’s the name of the game! Then place carefully in the hot oil. When it’s good and golden on one side, carefully flip. It helps to spoon oil over the sides and edges if your oil isn’t too deep. Again, this is messy, wear an apron.

When the whole chili is golden, place on a paper towel to drain for a few minutes. When they’re all done, put them directly into the pot with the salsa. The batter does loosen a bit in the salsa but that’s ok.

To serve, place a chili into a bowl and spoon the soupy salsa over it. Serve with warmed corn tortillas.

Then a few minutes later it will look like this…
This post is shared with Healthy 2day Wednesdays

7 Juli 2011

Super Green Pesto with Cashews and FINALLY How to Store Basil

If you are anything like me then your fridge is stuffed with beautiful greens that aren't your spouse's favorite and your kids won't touch with a ten foot pole. You also, now that it's July, might be starting to get some small basil bunches in your CSA of farmer's market. But basil here in the northeast isn't out of control yet like it will be in a couple of weeks.

I am completely sick of sauteed greens. And it's too hot for kale soup. In my fridge I had a half a bunch of spinach, some kale leaves and a small bunch of basil. So last weekend I whipped out the food processor and decided to make some Super Green Pesto.

SUPER BASIL NEWS ALERT!!: I think I finally discovered how to store basil. After years of struggling to keep basil from turning black or liquifying, I had just stopped buying it. I assumed basil was meant for people who had green thumbs and back yards full of sun. But in the summer it looks too yummy, I can't resist. Most of the TV chefs recommend cutting the stems and storing on the countertop in a glass of water like a bunch of flowers. For me, this resulted in foul smelling water and slimy inedible basil within 48 hours. Then I tried something different. I took my small bunch home from the farmer's market and soaked it just like my other greens in a sink full of water with some vinegar. I shook off the water and stored it in a plastic bag in the fridge in the crisper drawer. A couple of the leaves turned brown, but 90% of the bunch was happy and healthy a week later when I used it!! Finally. It only took me ten years to figure that one out.

Super Green Pesto with Cashews

1 Small bunch of basil
5-6 large leaves of kale
About 2 hearty handfuls of spinch
One garlic clove
Lemon juice (about 1 tablespoon)
A handful of raw cashews (about 1/3 of a cup)
Olive oil (about 1/2 of a cup)
Salt and pepper to taste

Chop or Chiffonade your kale, place it in your food processor. Add the basil leaves, spinach leaves, garlic clove, lemon juice and a drizzle of oil. Pulse until chopped but not pureed.


Add your raw cashews. Raw nuts are softer and will better attain the consistency you are looking for. Run your processor while you drizzle in the remaining oil. Your pesto may need more or less oil to achieve the consistency you want. I don't like a super oily pesto.


Scrape down the sides and incorporate everything. Add some parmesean cheese if you like. I didn't though. Add you salt and pepper to taste and give it a last run. There you go!


Rather than pouring over pasta, I sauteed some scallions, summer squash and snow peas. Just before they were done I added a healthy amount of the pesto and dropped a couple eggs on top. I covered the pan and let the eggs cook. It was a wonderfully light summer dinner but would make an equally good breakfast.

Pesto made entirely from basil can be too strong and not so high in nutrients. This is a great way to use your CSA greens and kick up the nutritional value of your basil pesto. It also freezes really well. I used half and froze half.

Enjoy!!

This post is shared with Simple Lives Thursday and Food Renegade's Fight Back Fridays

LinkWithin

Related Posts Plugin for WordPress, Blogger...